
*It should be noted that I decided to add a crumb topping AFTER mixing up the batter, so there is no picture of those ingredients.
1 1/2 C all purpose flour
2tsp. baking powder
1/4 tsp salt
3/4 C sugar
1/4 C butter, softened
1 egg
1/2 C milk
3 C fresh or frozen blueberries
Before you do ANYTHING, you have to sterilize the jars and lids.
Now, they have fancy-shmancy machinery that can do that for you. I am neither fancy, nor shmancy, so I just boiled mine. Take your biggest pot and fill it with enough water to cover the jars. Boil the jars and lids for 10 minutes. Remove jars and dry on paper towels. *While your jars boil, you can whip up your batter.
Heat your oven to 350 degrees. Sift together your dry ingredients onto a piece of waxed paper or parchment paper. In a large bowl, beat the sugar and butter until light and fluffy. Add egg, beat well. Alternately add dry ingredients and milk into sugar mixture. Fold in blueberries.
I've experimented with various forms of greasing the jars and I've found this method to work the best. Using a paper towel folded around your fingers, smear Crisco all over the inside. Be careful not to get ANY on the lip of the jar. If you do, just wipe it off with a paper towel.

Fill the jars about 2/3 of the way full.

At this point, I decided a little crumb topping was needed. I combined 1/3 C flour, 1/2 C brown sugar, and 1/2 tsp cinnamon. Cut in 1/4 C butter. Sprinkle on top of your batter filled jars.
To catch any spill-overs, and it's just plain easier this way, put your jars in a pan and THEN into the oven.
I baked mine for about 25 minutes and they were done. Test them the same way you test any cake. Of course, you'll need a much LONGER toothpick. Since I couldn't get the giant at the top of my beanstalk to part with his, I just used a kabob skewer.
Carefully pull the lids and rings out of the water. Quickly dry them off with paper towels and set the lids on top of the jars. As they cool they will seal. You'll start to hear little "pops" as they seal.  Once they're sealed and cooled, screw on the rings and you're finished.

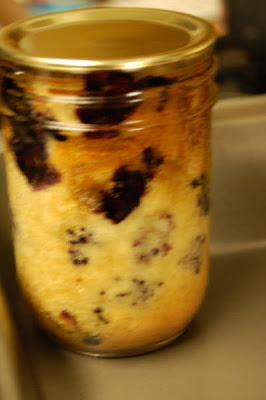
This last picture was taken with my cell phone this morning. I brought one to work for breakfast. I just loosened around the edge with a butter knife and the cake slid right out.


9 comments:
I am SO thrilled by those little "cup cakes" !!!
AND, happy 100th; here's to a hundred more!
::throws confetti:: happy 100th :) that cake looks delish
What a great idea...my hubby will love this...he misses home cookin'!
***Happy 100th!***
OMGosh! What a great idea! Thanks for sharing!
Always late for the party. Always more than a dollar short as well. Oh well. found a nice box to mail your prize. looking for a good online tutorial too.
Happy 100th my dear!
That is so dang cute. Happy 100th!
Happy 100th!
This is such a great idea!!!
HAPPY 100th POST!!!!!!! This is truly something to party about!
BTW...stopping by from Blogstalkers!
Happy 100!
Those little jar cakes are so fabulous!
Post a Comment